Masking is an artistic technique whereby you protect the paintwork you've already done from the next steps you're going to take. Imagine parking your car on a dry street, going into the shop, and in the meantime, it starts raining. Once you come out and drive away, the patch where your car was will still be dry. Okay, so it's not the best metaphor you've ever heard in your life, but that's basically what masking is: something goes on top of paintwork to get between the already existing paintwork and the newly applied paint. This is especially useful if you're a committed airbrusher like myself, allowing you to paint more with air while avoiding overspray.
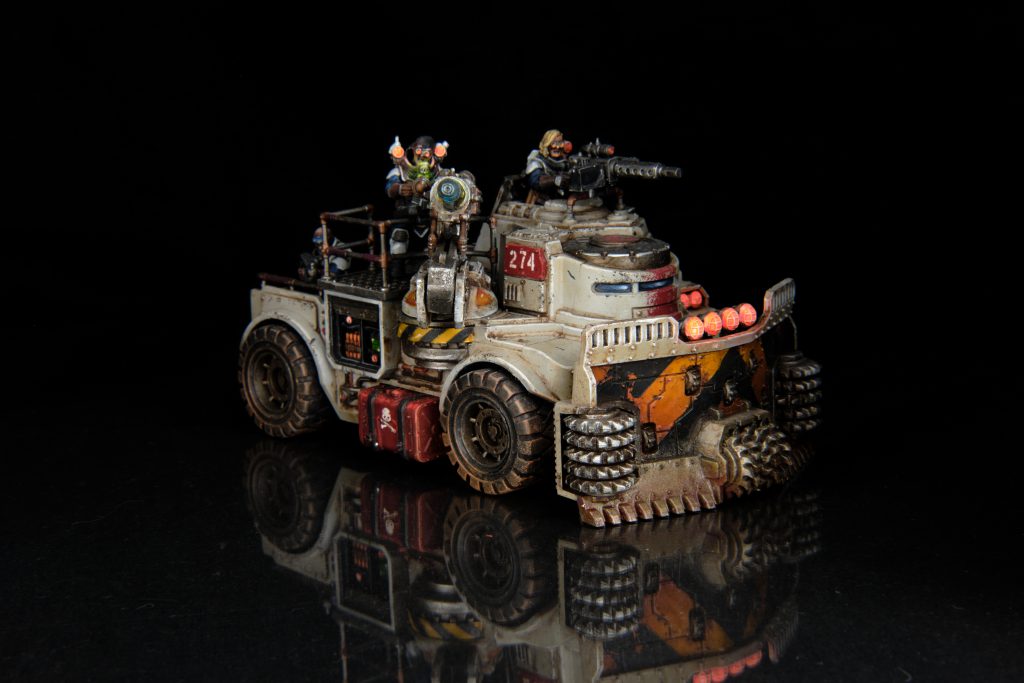 The hazard striping on the blade of this Rockgrinder and around the base of the turret were done with masking tape - Credit: Keewa
Masking Tape
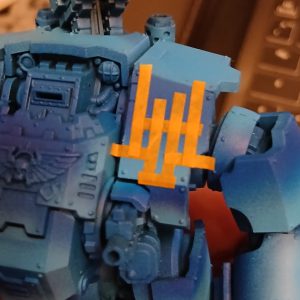
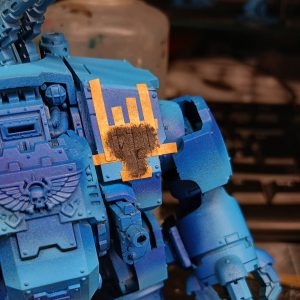
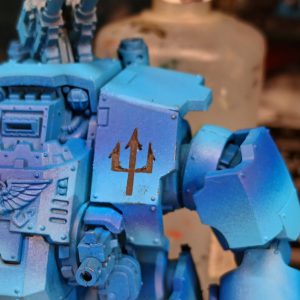
For the purposes of our discussion, there are really 4 different types of mask you can use while doing miniature painting. The first is probably the most common, and one you're likely already familiar with if you've ever done any decorating - Masking Tape. Masking Tape is a paper-based tape with a relatively low adhesive backing (though still too high for our use, but more on that in a bit). Because the tape is cut into one long, straight-sided strip rolled onto a cardboard tube, masking tape is particularly useful for marking out straight lines. If you're thinking the ever-present and very striking Hazard Stripes that adorn our Warhammer miniatures when I say that, you are absolutely correct, but other designs can also benefit from using masking tape, as long as they include straight lines, like the trident on this Emperor's Children dreadnought:
I painted these designs using 2mm Washi Tape, which is a really, really low-adhesive kind of masking tape; if you don't have any and want to use the standard painter's masking tape you might find in a DIY shop, it's important to start by removing most of the glue from the back. You can do this by cutting your strip and applying it sticky side down to the desk. Once it's stuck down, pull it off, then repeat the process until it's not that sticky. This is important because if you put down very sticky masking tape on paint that's not super robust, there's a good chance you'll pull the underlayer of paint up when you peel it off.
Stick your tape down carefully, without pressing too hard. If you intend to use paint that isn't too thick to paint your design, there's something you'll want to consider. Paint that's too thin can bleed underneath the tape and make an awful mess of your original basecoat. Obviously, this presents a bit of a problem when airbrushing, since airbrush paints are, by nature, supposed to be very thin.
How do we get around this? If your basecoat is a solid colour, the answer is really simple: just paint that colour along the line of the tape! Once it's dry, the paint you applied will effectively "seal" the tape and stop any paint from bleeding underneath it. If you're a fancy boy or girl and you've done some intricate gradients on your basecoat, it will obviously be much more difficult to paint this on the tape line - but worry not, we have another option: Varnish. By painting some matt varnish along the line of the tape, we can fulfill most of the functions of the paint in the previous option, sealing the tape without changing the colour of the basecoat. Perfect!
Apply this paint or varnish
thinly (ideally with an airbrush). If you don't, you'll end up with a strange ramp or plateau effect when you remove the tape later.
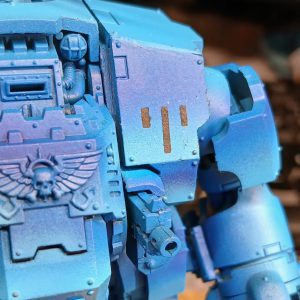
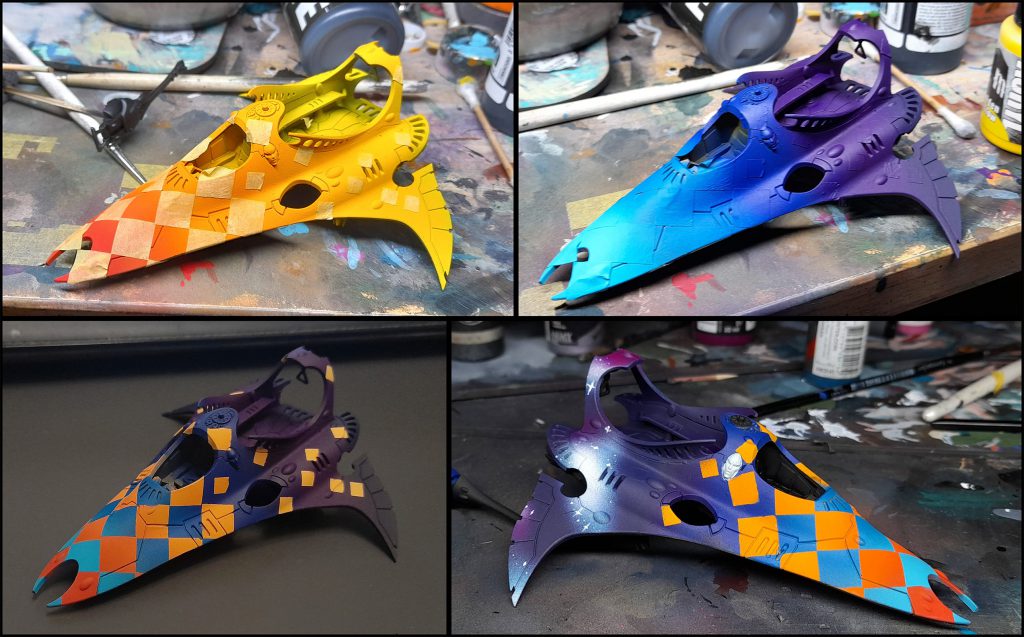 With masking tape and an airbrush you can do some pretty swish things
Liquid Mask
The next option in our arsenal of masking materials is the liquid mask. This is effectively liquid latex that you paint onto your surface with a brush, which, once dried, forms a covering over the area you want to protect. You paint over it as usual, and once you're done, you just need to peel it off to reveal your perfectly masked area. A common way of peeling off liquid mask is using a soft rubber (pencil eraser for those of you outside the UK), the friction generated is enough to pull the mask free of the surface without damaging the paint underneath.
I have to be honest with you, I'm not a big fan of liquid mask for miniature painting; it's pretty messy and seems to work a lot better for art that uses a flat surface like watercolour paper.
Putty
When I paint with an airbrush, I do a lot of masking to control overspray, and the majority of that is with silicone putty. In a sense, this is like the opposite of masking tape; rather than straight lines, putty is more formable into irregular shapes so that you can use it on things that don't have straight edges. This extends to creative uses as well; if you're painting the blobbiness of camouflage patterns on your tanks, this is the sort of thing you're going to want for that. This kind of putty goes by many names all over the world - the version I have from a toy shop is very charmingly called Einhornkacke (lit. Unicorn Poo), I've also seen it called things like Crazy Putty, Thinking Putty, things of that nature. The important point is that it's silicone, which means that it doesn't really stick to anything but itself.
You might be tempted to use Blu-Tac or Poster Putty for the same application, and it's certainly possible, but I would caution against it - these putties are very adhesive (that's what they're for) and removing them might pull up your paint and make an awful mess.
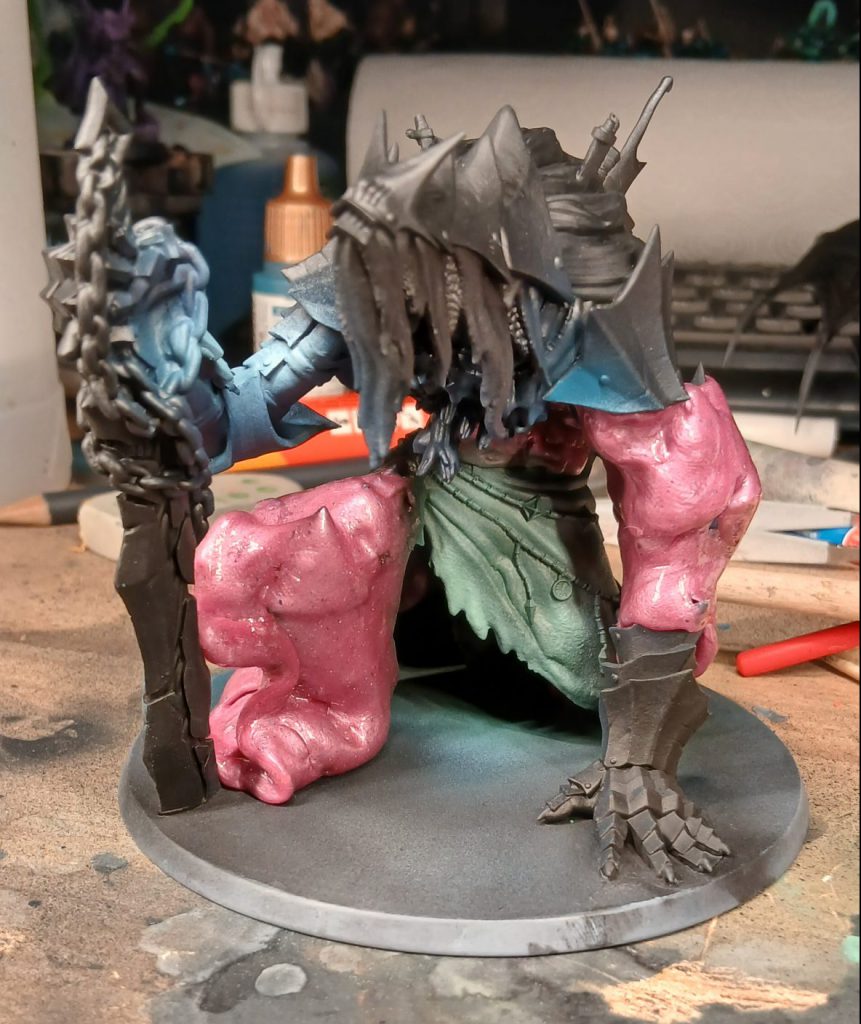 The Unicorn Poo protects the skin of the chest, leg, and arm while I spray the green of the skirt
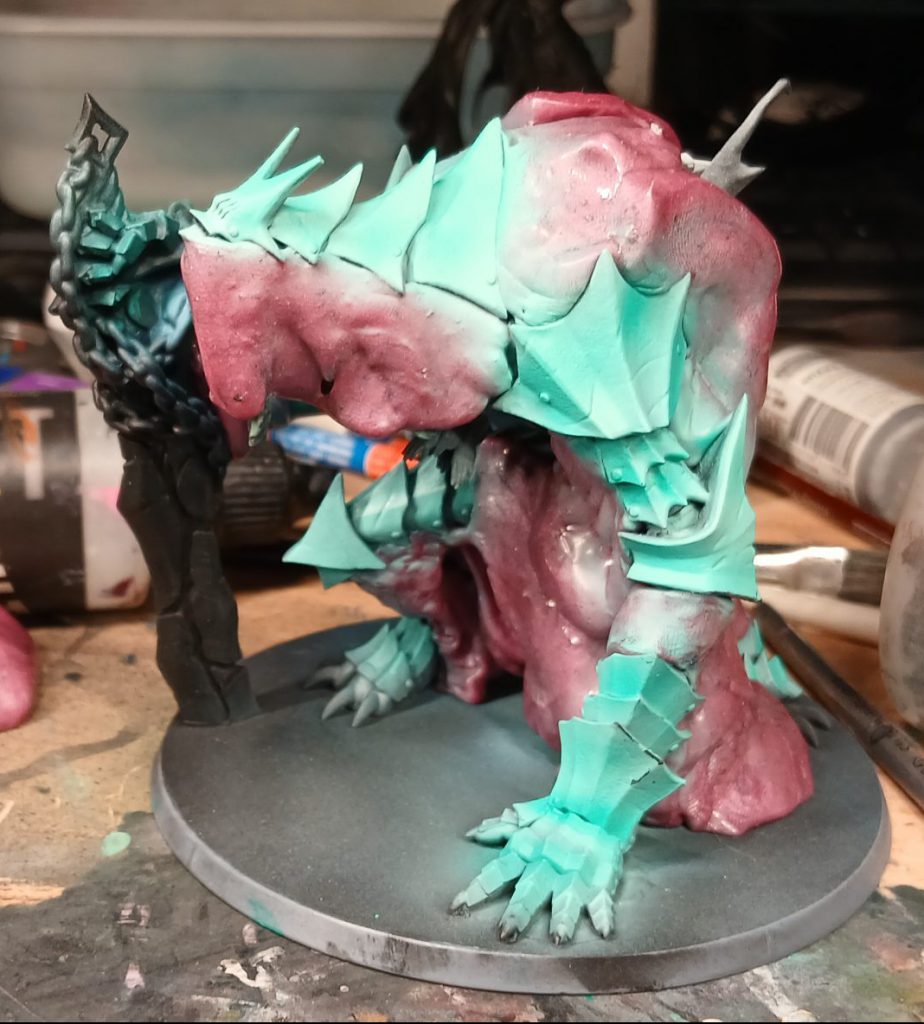 The putty protects all the already-painted skin and cloth while I spray the verdigris base of the bronze armour
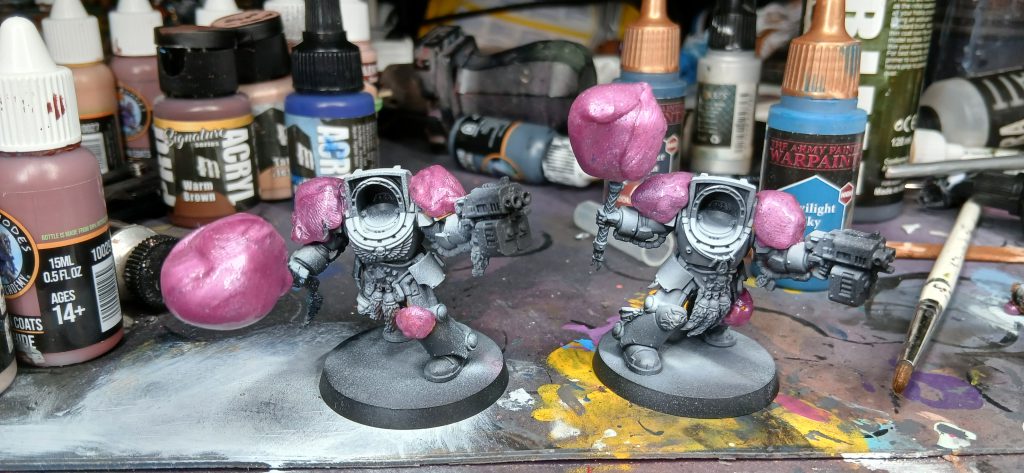 The masking putty protects the yellow already painted on the knee and shoulderpad, as well as the power lades on the axes
Using it is pretty simple: You just mould it around the parts you want to protect. If you need to push it into hard-to-reach parts, you can just prod it with a toothpick - since it's silicone, nothing will stick to it, and it will stick to nothing. When you're done, you can just get a blob of putty in your hand, press it to the putty on the model and pull. The putty will come away cleanly, but if there's any residue, just dab it with the putty and it'll come right off. I love this stuff.
Plastic Wrap/Bag
Almost like a raincoat for your model, you can use a plastic bag as a mask if you're painting things that poke out away from the model itself. I use this one particularly for power swords.
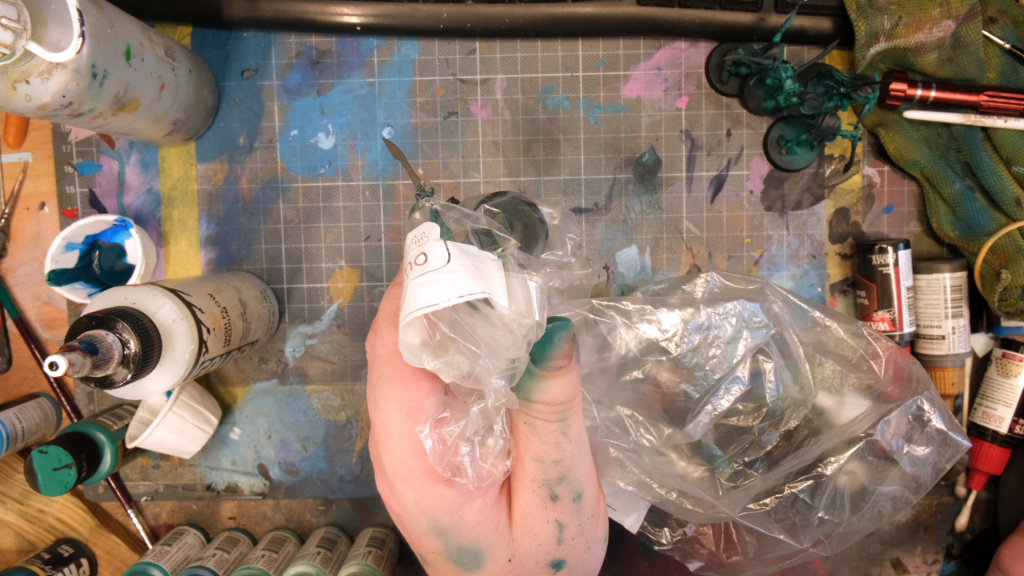
Typically, what I do is take a freezer bag, poke a small hole with a pin, then push the sword, spear, whatever through the hole just enough so that it's exposed and everything else is covered. If necessary, I might tighten the seal with a little masking tape. This method is quite quick and dirty, and it certainly isn't perfect, but protecting the rest of the model definitely makes painting small bits with the airbrush much easier.
As a fully paid-up airbrush botherer, I tend to mask a lot in my painting. It helps me a ton to paint faster and better than I ever could without. Give it a try!
Have any questions or feedback? Drop us a note in the comments below or email us at contact@goonhammer.com. Want articles like this linked in your inbox every Monday morning? Sign up for our newsletter. And don't forget that you can support us on Patreon for backer rewards like early video content, Administratum access, an ad-free experience on our website and more.Thank you for being a friend.


 Goonhammer Hobby Round-Up: March 2026
 Goonhammer Reviews: Tribal Conquest
 Conquest: Weaver Courts Gemred Knights and Scaile Dancers Model Review