Thanks to Games Workshop for providing this miniature in advance for review.
It's a long old time since the first plastic Imperial Knight, now known as the Questoris pattern, hit our shelves. In the years since, we've seen an expansion of the range to include small (Armiger), tall (Cerastus) and wide (Dominus), and you'd be forgiven for thinking that the Imperial Knights depth chart was pretty much complete.
The Forges of Mars have other ideas though. Screaming onto the battlefield in a rocket-assisted lance charge, the Knight Destrier is here to bolster your ranks. Tally ho, indeed.
The Sculpt
This new Knight chassis stands between an Armiger and Questoris in size, although it's probably two-thirds of the way to Questoris on that scale. My overwhelming feeling looking at the box was "this is way bigger than I expected" and it really does feel like a much larger model than the Armigers.
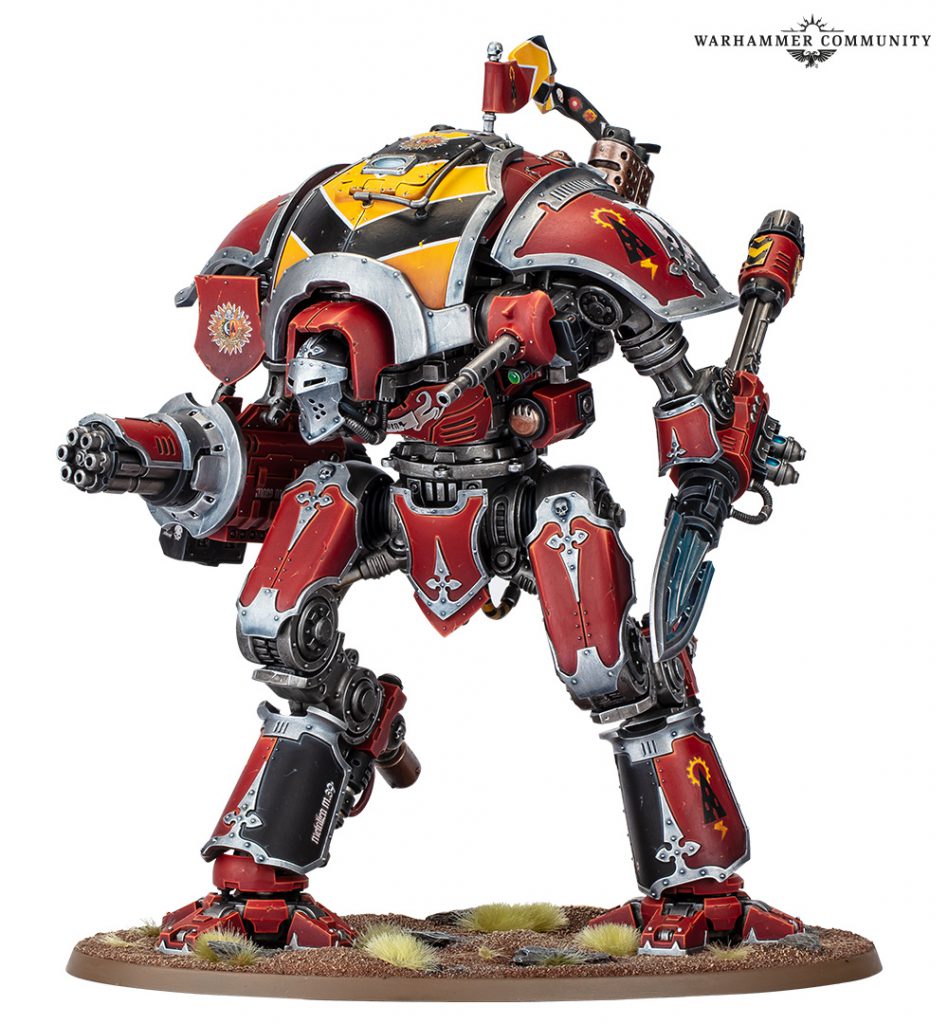 Eavy Metal Knight Destrier. Credit: Games Workshop
Where I feel like this model differs from it's smaller and larger comrades is its sense or motion - or perhaps more accurately,
impending motion. A lot of (default) knight poses are quite static, and although this one doesn't break trend in being midway through a step, in the box art configuration it has a sense of being a coiled spring, ready to rocket forward with its boosters and drive a lance through the heart of its quarry. Adding to the noble vibes, the Destrier eschews hanging banners for a trailing pennant mounted to the top of the carapace, an addition which frankly rules so much that I'm tempted to retrofit it to every other class of knight.
If the noble, elegant lance isn't your style, there's also an option for a wicked looking chainsword arm, and the Chastiser gatling cannon can be swapped for a frag bombard if preferred. You also have a choice of three different faceplates.
The Sprues
The Destrier is spread across two large and two small sprues, and roughly speaking you could split those into legs, body, armour panels, and weapons. In reality though, bits are spread all over the sprues. Parts are numbered sequentially to the build, and spread across the sprues, so it's a little frustrating to find the parts you need sometimes. This isn't unique to this kit, but I did find it really added to the build time of the kit due to its size and complexity.
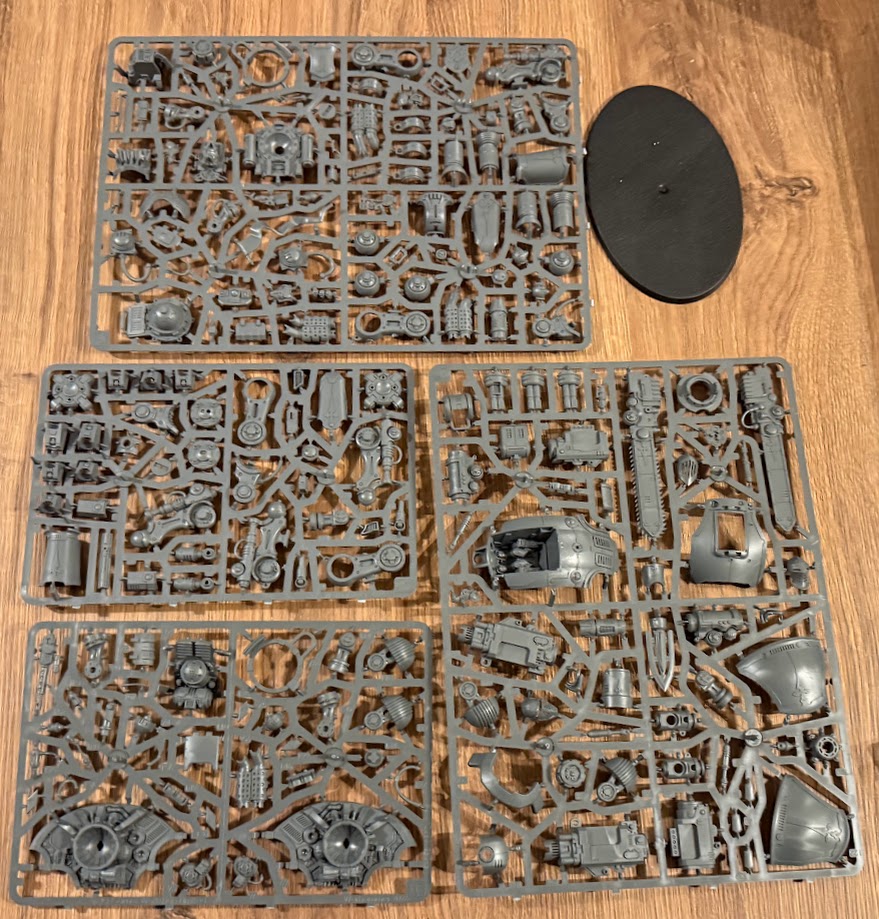 Imperial Knight Destrier sprues. Credit: Rich Nutter
The box also includes a new transfer sheet labelled for the Bellatus class Knight.
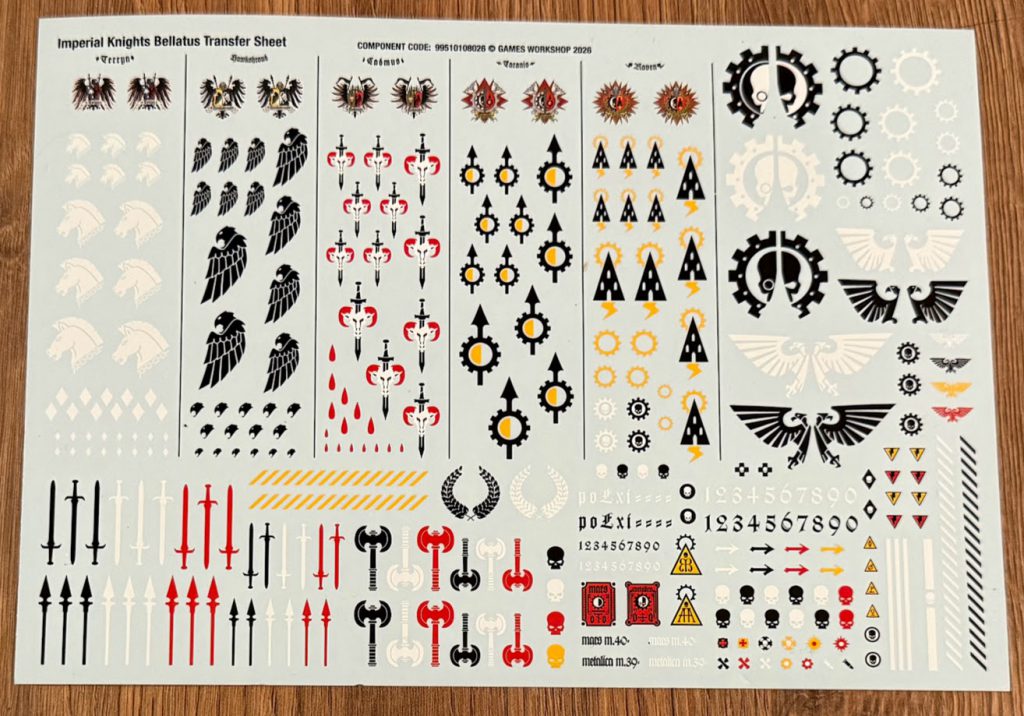 Imperial Knight Bellatus transfer sheet. Credit: Rich Nutter
The Build
Sprue woes notwithstanding, the build for the Knight Destrier was pretty enjoyable. The instruction manual is chunky, but a large part of that is providing three alternate builds for the legs - one with each of the left or right legs forward, and also the advanced posing options where you can cut off the locating pegs in the ball joints to make a more custom pose. Any of the four weapons can mount to either arm, which is pleasing, and this plus the poseability of the kit should make it easy to make your Destrier unique to you, or different from its kin if you're adding multiple to a force.
As we've come to expect from Knight kits, all of the significant armour panels are separate for painting convenience. During painting I also left off the head, faceplate, and the safety railing around the hatch, for accessibility's sake.
One thing I want to note - early on in the instructions (step 1c, and a couple of others), the views of the legs in the boxout are reversed and incorrect. This really confused me and slowed me down for a while. My advice is to follow the main instruction images and numbers (not the boxouts/inserts) and it should see you right.
The Painting
I haven't ever embarked on painting a knight household for 40k (maybe that is more likely now), but I did get very into Adeptus Titanicus when it launched. I built Legio Ignatum, the Fire Wasps, who are allied with House Taranis, and so that's the scheme in which all of my epic scale knights are painted. There is a twist, however - in my first encounter with House Taranis, which I think was in the Horus Heresy novel Mechanicum, they're described as having blue armour, and so that's how mine are painted too. This diverges from Taranis' current canon red scheme, but who's keeping count.
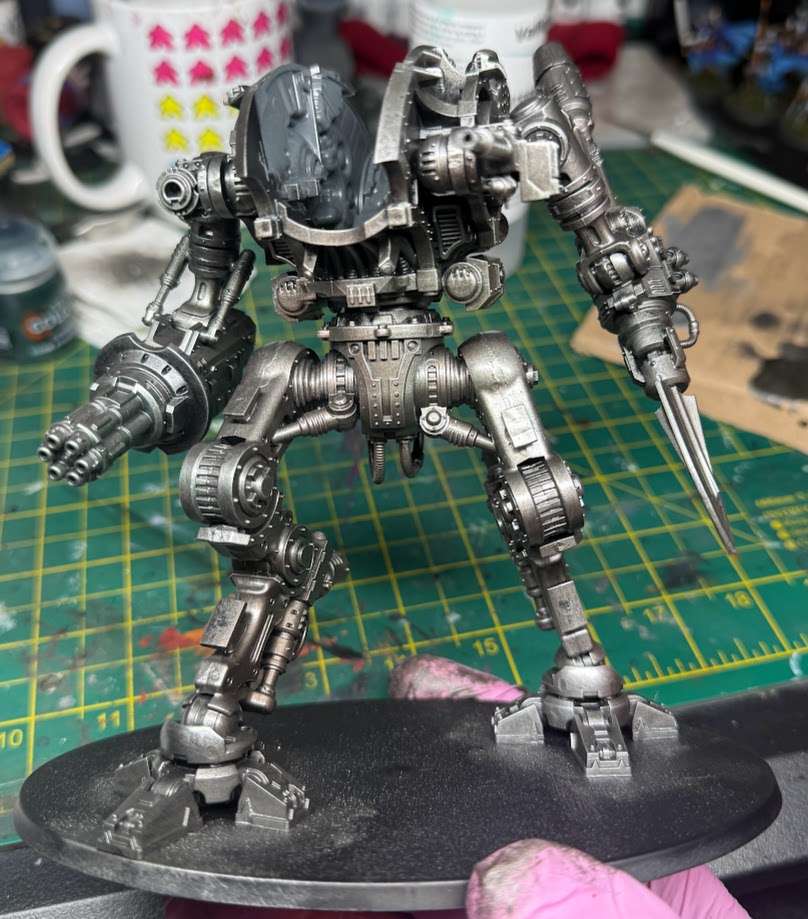 Knight Destrier skeleton. Credit: Rich Nutter
After priming black, I stippled up the skeleton with Vallejo Metal Colour Exhaust Manifold, mixed with a little Black Legion Contrast. This is a wet paint, but it stipples on nicely using a big brush over a couple of coats. I built up a few brighter areas with Burnt Iron from the same range, and painted any areas that would be worn by movement (mainly pistons) with Vallejo Model Air Silver. After this, I washed the whole frame with Villainy Ink's Ichor of the Damned, a black enamel wash, making sure to keep my brush wet with spirits to avoid it going on too thick. After letting it dry and settle for a while, I went back with a sponge dampened with spirits to pull excess grime off of the high points. The skeleton then got a satin varnish through the airbrush.
The panels were airbrushed with Two Thin Coats blues/blacks, other than the top carapace that was being hazard striped. That got an initial coat of a desaturated yellow-brown, before layering up Tamiya Flat White to get a nice gradient, which was then tinted bright yellow with Imperial Fists Contrast. I find this gives a really rich yellow with a bit of depth. I taped off for the hazard stripes and sprayed black, and found that my edges had bled a bit due to me rushing. At this point I made a decision I've made 100 times before: "I guess we're doing a lot of weathering to cover this up".
Panels were glossed, transfers applied, gloss again, Ichor of the Damned in the recesses, then a final ultra-matt varnish (which in the end I'd decide I didn't like, and coat the whole thing in satin). The trim was painted with a bright silver, and recesses picked out in a blue wash without coating the whole areas to retain shine.
 Knight Destrier - test fitting the panels. Credit: Rich Nutter
I continued adding details like lenses, and (running out of time at this point) filled in some of the weapon casings and the like with Black Legion contrast. After this I sponged liberally with a bright blue on the blue areas, and a grey everywhere else, and then went over this with a red-brown (including catching the trim). After a few final details like an airbrushed gradient on the banner and a base, and the Knight Destrier was ready to march for House Taranis and the glory of Mars!
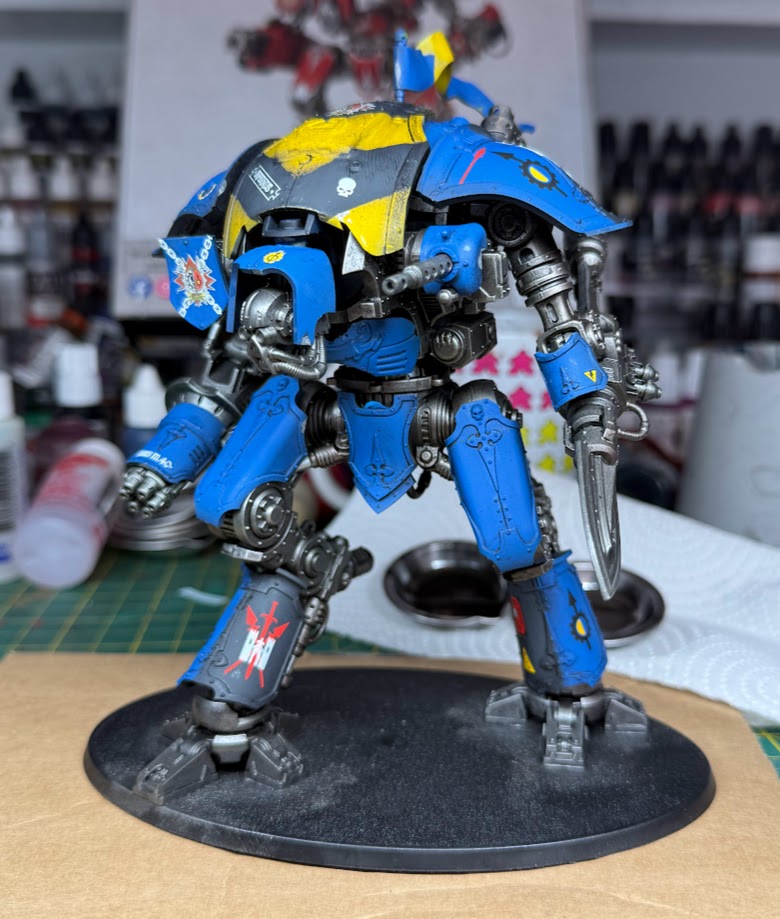
 Imperial Knight Destrier. Credit: Rich Nutter
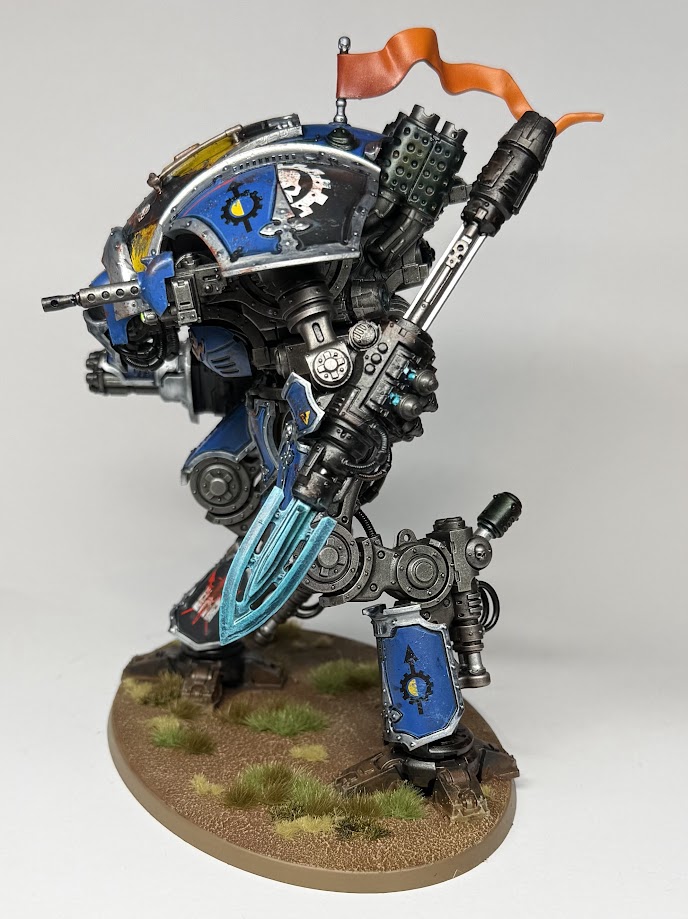 Knight Destrier side profile. Credit: Rich Nutter
I'd have loved to really lavish time on this with an Eavy Metal-style edge highlighted paint job, but ultimately I think my scheme is much more achievable for getting an army done in a reasonable timeframe, and I'm pretty happy with it. I'd like to go back and add some detail to the banner and tidy a couple of other bits up, but it's certainly more than good enough as is.
The Verdict
If you'd asked me if we needed another Knight chassis I'd have said no, but I really like this medium-sized guy. The model is dynamic, with a lot of options for posing and loadout, and should fit nicely into any existing Imperial Knight household. It is probably about as much work as a Questoris Knight though, so don't think it'll be as quick as doing an Armiger!
Have any questions or feedback? Drop us a note in the comments below or email us at contact@goonhammer.com. Want articles like this linked in your inbox every Monday morning? Sign up for our newsletter. And don’t forget that you can support us on Patreon for backer rewards like early video content, Administratum access, an ad-free experience on our website, and subscriber-only content covering competitive Warhammer 40K!
Thank you for being a friend.


 Goonhammer App and Patron Updates: April, 2026
 Contemptor Kevin's Combat Patrol Issue 46 Review
 Kill Team Tournament Report: Engage, Party, Repeat's March Madness 2026