Boarding Actions make a return in 500 Worlds Titus - Dread Incursions. Featured in this book are the original rules to Boarding Actions, two detachments to add on for both Adeptus Astartes and Necrons, rules using the new Necron Tombworld Terrain and 12 new missions to play. In this review we'll talk about these missions and the campaign frameworks designed to use them, how they play, and what you need to know about running them.
In case you missed our prior coverage of Boarding Actions Rules and terrain, you can find them here:
Before we dive in, we'd like to thank Games Workshop for providing us with a preview copy of these rules for review purposes.
New Boarding Actions Rules
We knew it was coming when the new terrain set released midway through last year and now the new rules are finally here: The Tomb World terrain takes the standard boarding actions rules to the limit, adding rules for new tactical manoeuvres and interactions with the terrain. The rules and tactical manoeuvres however are split between pages 48-49 and 79-80 in classic GW fashion, so we’ve put it all together in a quick summary.
Quantum Field Hatchways: These hatchways do not block visibility, and are treated as open when measuring distances for ranged attacks. You cannot measure any other distances through them. Additionally, any ranged attacks that go through one or more Quantum Field Hatchways have their AP characteristic improved by one. This can be reversed by the
Polarity Adjustment tactical manoeuvre, instead reducing the AP characteristic by one.
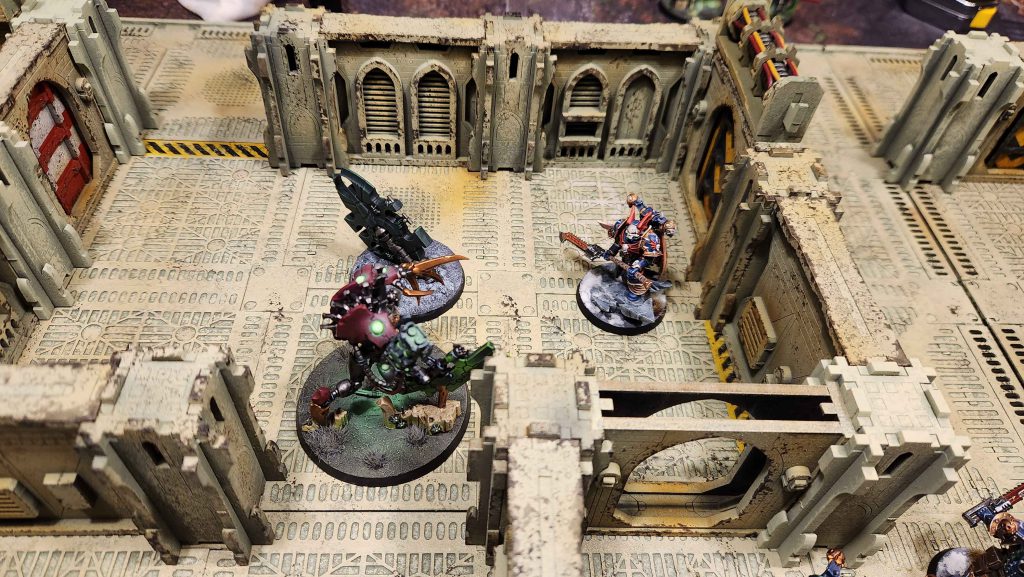
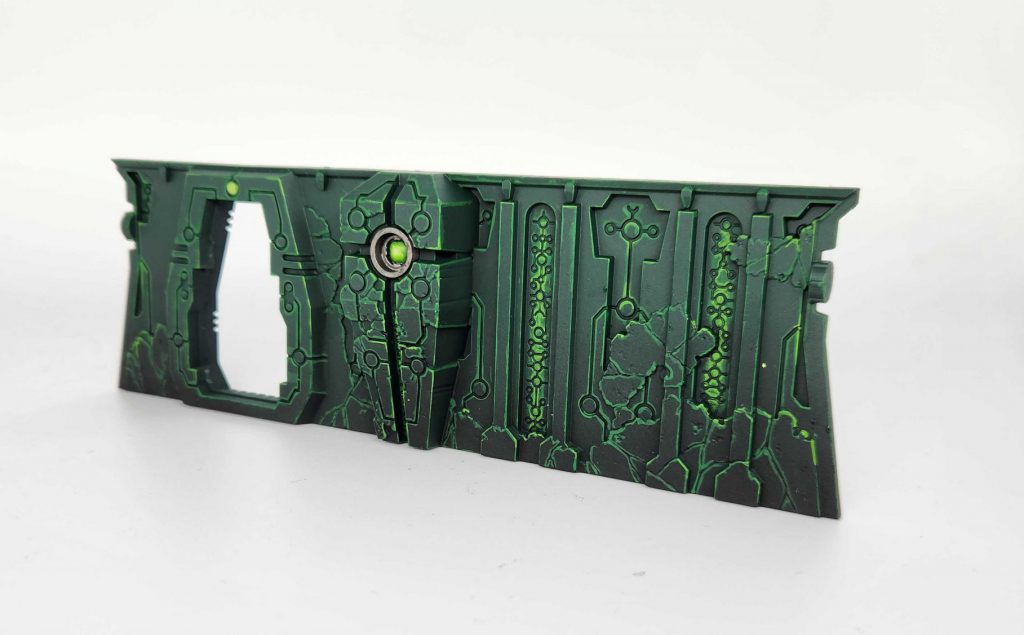 Credit: Robert "TheChirurgeon" Jones
Makeshift Breach Hatchway: These are considered hatchways; when operating them, roll a d6 and on a 2+ the hatchway is open and can no longer be operated and closed. Additionally, the rule Swift Breach prevents the unit operating the hatchway from being fired upon from overwatch as a result of them opening this hatchway.
During the beginning of the fight phase, a unit within 1” of the hatchway can attempt to operate the hatchway; if successful, and if the unit is within engagement range of one or more enemy units which are wholly on the other side of the hatchway, the unit that operated the hatchway gains Fights First.
Translocator Dais have the Dimensional Translocator rules. Missions will specify when each Translocator Dias is active, and at the end of a player’s movement phase, for each active Translocator Dais, they can choose a unit that is wholly within 3” and visible to that locator and not within engagement range of enemy models. They can then set up that unit at another active locator, as long as they can be placed wholly within 3” and out of engagement range of enemy models. Any models that can’t be set up this way when doing so are destroyed.
Credit: Robert "TheChirurgeon" Jones
Makeshift Breach Hatchway: These are considered hatchways; when operating them, roll a d6 and on a 2+ the hatchway is open and can no longer be operated and closed. Additionally, the rule Swift Breach prevents the unit operating the hatchway from being fired upon from overwatch as a result of them opening this hatchway.
During the beginning of the fight phase, a unit within 1” of the hatchway can attempt to operate the hatchway; if successful, and if the unit is within engagement range of one or more enemy units which are wholly on the other side of the hatchway, the unit that operated the hatchway gains Fights First.
Translocator Dais have the Dimensional Translocator rules. Missions will specify when each Translocator Dias is active, and at the end of a player’s movement phase, for each active Translocator Dais, they can choose a unit that is wholly within 3” and visible to that locator and not within engagement range of enemy models. They can then set up that unit at another active locator, as long as they can be placed wholly within 3” and out of engagement range of enemy models. Any models that can’t be set up this way when doing so are destroyed.
Players can perform the
Transdimensional Disruption manoeuvre on a Translocator Dais upon passing a leadership test, choosing one of two effects. First, Corrupted Matrix rolls a d6 for each model in the unit; on a 1-3, the Translocator Dais randomizes their placement. The second effect, Damaged Phase Aligners, also rolls a d6 for each model in the unit; on a 1, they suffer 1 Mortal Wound -- but character units with a starting Strength of 1 suffer 3 Mortal Wounds instead.
Sarcophagus are treated as objective markers. They also provide cover, and models can’t move through them. Debris are the small scatter terrain in the Tomb World set, and give cover if it isn’t possible to trace a straight line from the attacking models' base to every part of the target model without passing over any of the debris. These also reduce normal moves, advance fall back moves, and charges by 1” if passing over the debris.
Detachments
There are two new Detachments in the Dread Incursions book, one for Space Marines and one for Necrons.
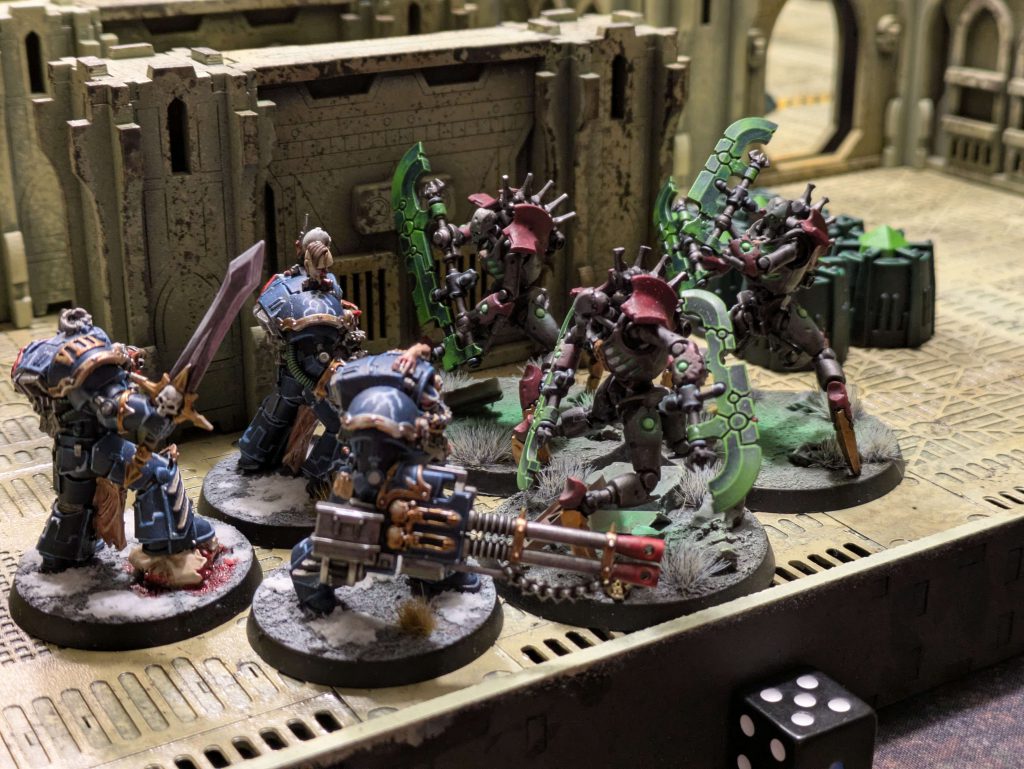
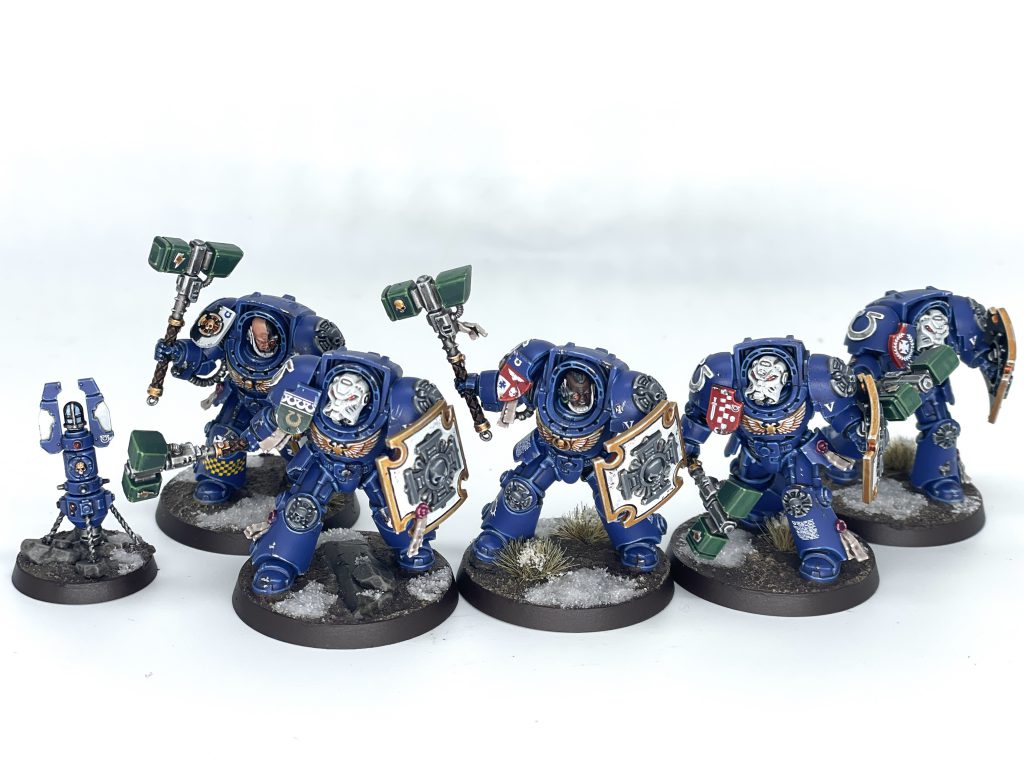 Ultramarines Terminator Assault Squad with Thunder Hammers and Storm Shields. Credit: SRM
Shield of the Void
This is an Ultramarines-focused Detachment; you are allowed to bring generic marines, but if you draw any marines from a Chapter, that chapter can only be Ultramarines. Notably, while this is an Ultramarines-themed Detachment, unique Ultramarine units like Victrix Guard and the new Wardens of Ultramar are missing from the units list, which, good. This Detachment has the feel of a go-wide defensive Boarding Patrol force.
Army and Detachment Rules: You keep
Oath of Moments for re-rolls to hit, and the Detachment allows you to hit on an unmodified hit roll of 5+ when you Set Overwatch, while you get -1 to be hit by incoming attacks in the Fight phase when you Set to Defend. These are great abilities if you remember to use those tactical manoeuvres.
Mustering Your Army: Your boarding Patrol keeps more or less of the same restrictions of building out space marine Detachments as found in the original boarding actions book. With the caveat that any chapter that isn’t Ultramarines isn’t allowed here. The big thing here that Boarding Actions veterans will notice is that this Detachment can take a single unit of Terminators, allowing them to finally have a Detachment with Terminators that isn't all Terminators.
Enhancements
- Speartip of the Chapter gives you and one friendly unit in the same deployment zone a 6” move. Similar to having Scouts 6".
- Tolorek Data Djinn allows you to secure an objective the bearer is in range of on a 2+ if you control it. Securing on a roll is rough, but at least it’s on a 2+.
Stratagems
- Codex Warfare (1CP) allows a unit to shoot and charge after falling back.
- Overcharged Breach (1CP) breaks open a hatchway you can operate and force it open permanently, great for setting up a ranged attack and creating new LOS.
- Adaptive Purge (1CP) gives one unit [Lethal Hits], [Sustained Hits 1], or [Ignores Cover] to a unit during the shooting phase.
- Rapid Takeover (1CP) is a reposition move that lets a unit do a d3+1” normal move after a unit falls back from them.
This is one of the better Marine Detachment options, and it feels almost like a stripped-down version of the Gladius Task Force.
Assault Intercessors and Sternguard are strong choices, with the former letting you re-roll wounds on objective markers and the latter getting re-rolls to wound against your Oath target.
Example list - Click to expand
Space Marines
Shields of the Void
485/500 points
Captain in Gravis Armour 80 points
Lieutenant 55 points
Assault Intercessor Squad x10 150 points
Sternguard Veteran Squad x10 200 points
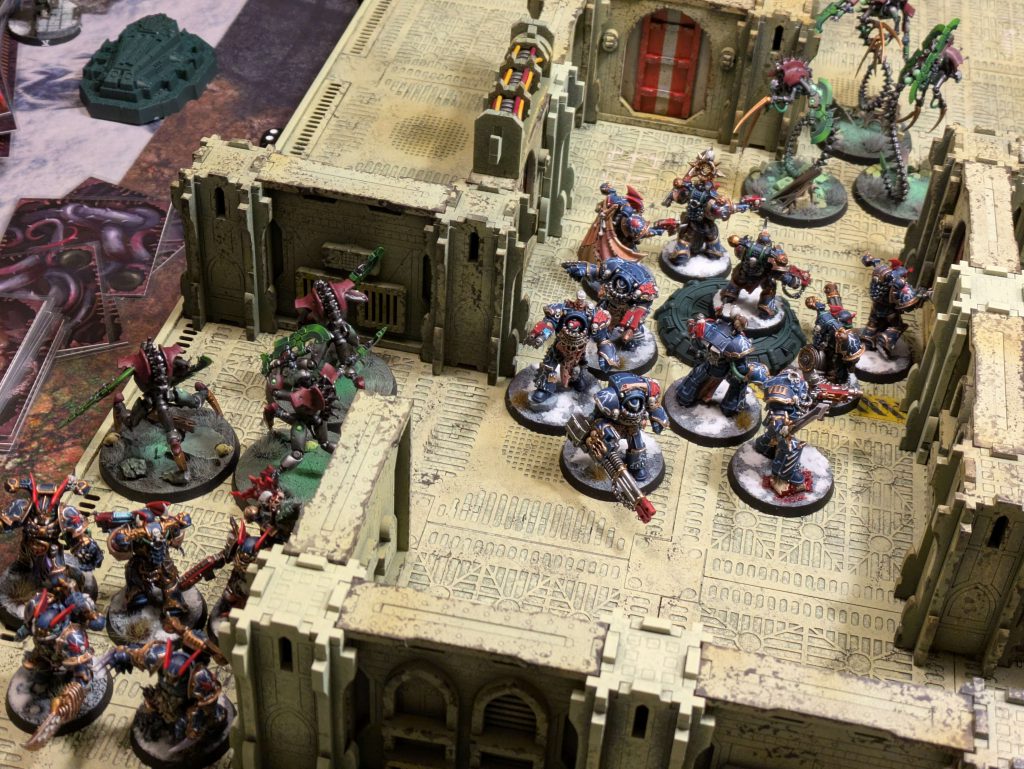
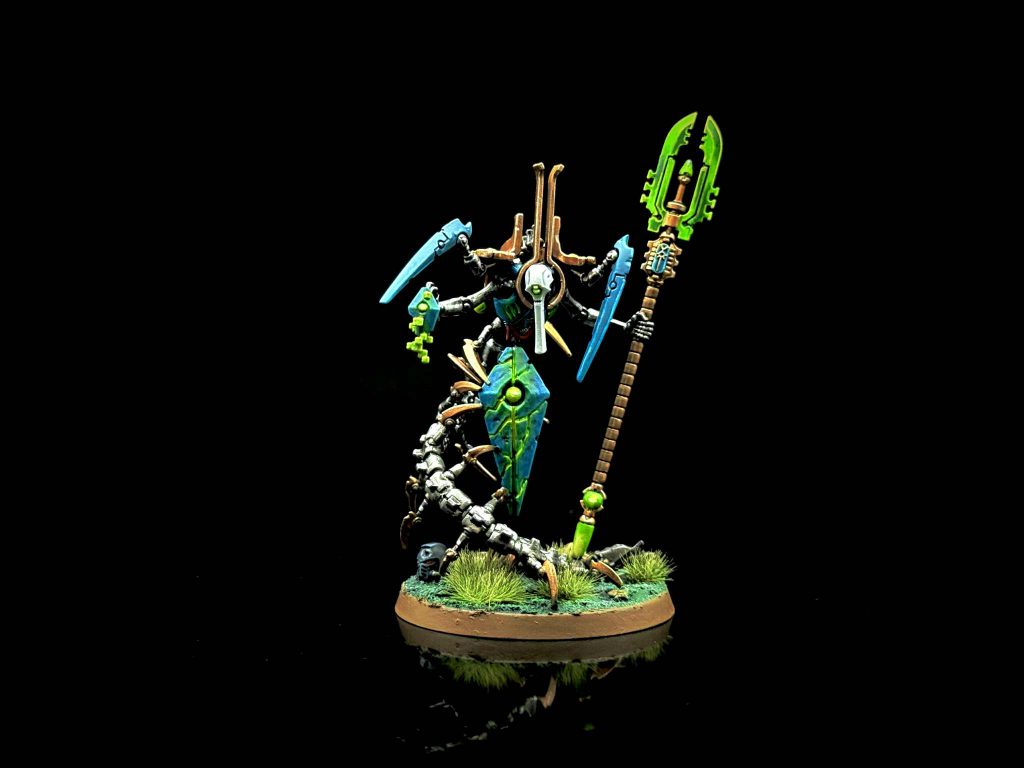 Credit: Dan "Swiftblade" Richardson
Harbinger Cabal
The Necron Detachment is all about running basic Warriors and Immortals. In fact, those are your only non-character options, and the characters are all Crypteks of various types. The Geomancer makes a showing here.
Army and Detachment Rules: Transdimensional Reinforcement is your Army rule, getting you the same pseudo-reanimation you'll be familiar with as a Necrons Boarding Actions player. The Detachment rule, Arcanoscientific Expertise, Lets you pick extra abilities for each of your Cryptek units each round in your Command phase. These effects are giving +2 to Advance rolls to nearby Necron units, +1 Strength to nearby Necron units, or a 5+ invulnerable save to nearby Necron units. As a set of 6" auras, these are all pretty solid, but you'll need to watch yourself moving around corners and in spots where you can inadvertently put yourself out of range.
Mustering Your Army: Your army can include up to three units each of Immortals or Necron Warriors, and every type of Cryptek, including Szeras and Orikan.
Enhancements
You have two options here, as usual. Cryptometric Experimentation gives the bearer +1 Toughness and Wound, plus a 4+ invulnerable save. Good for survivability. The Portal Transporter gives you a once per turn teleport with the unit so long as you're near a doorway, and this is a very solid ability to have.
Stratagems
- Dynamic Reconfiguration (1 CP) - Used in any phase to give one of your Crypteks a different Detachment buff for a round.
- Hologyric Simulation (1 CP) - Used in your Shooting phase or the Fight phase to re-roll hit rolls for a unit within 6" of a friendly Cryptek, and if your unit has the Cryptek keyword, re-roll the wound roll instead.
- Anti-Proximal Subroutines (1 CP) - Used in your Shooting phase to give a unit [PISTOL] until the end of the phase.
- Continuum Realignment (1 CP) - Used at the end of your Fight phase to let a Cryptek make a normal move of up to 3".
This is an interesting set of Stratagems but ultimately are a bit held back by the fact that Warriors just aren't amazing in Boarding Actions. At only 5 models, Immortals are in a bit better place, but neither they nor Crypteks are really the datasheets you want to build around.
Dread Incursion Campaign
Dread Incursions features multiple ways to run a campaign using missions within this book. Roles are taken as Aggressor or Protector, who takes on each role is really a narrative choice - it doesn’t have to be Necrons protecting a Tomb World (though that’s what we used for our test games) - it could just as easily be a Shield Captain trying to protect an Imperial Ship or Genestealer Cults trying to infiltrate a Thousand Sons’ strike cruiser. Each type of campaign gives benefits on what the Aggressor or Protector take on for benefits or roles for missions, for example some missions will say the Aggressor is the Attacker, and Protector will play as the Defender.
Types of Victories are determined by points differential; if at the end of the game, a player has 30VP or more than their opponent they have achieved a major victory and will be the advantage player in the next battle, which will be explained in the next campaign battle. If there is a draw, players will roll off to determine which path to follow in the campaign. A roll-off win is considered a minor victory.
There are three different tree campaigns here, each one designed to use different Boarding Actions terrain. The Eldritch Depths and Boarding Strikes campaigns are tree campaigns, with their own narrative flow charts covering 3-4 missions going in different directions depending on whether the Attacker or Defender wins a mission. Eldritch Depths uses the Tomb World terrain set while Boarding Strikes uses the original Boarding Actions set.
Ship to Ship Conflicts is a linear campaign which combines both sets of terrain, simulating vessels locked in space combat with two intersecting stories. Players can either alternate playing missions from the Boarding Strikes and Eldritch Depths missions sets, or if they’re playing in a 2v2, take on those missions in parallel. Advantages are determined each round based on the previous round’s winner. The flow here is linear rather than branching, though the final mission is determined by which side won the previous two missions.
Lights in the Darkness uses one or both of the compatible terrain sets; this campaign doesn’t use a campaign flow chart but instead uses randomly determined missions as players progress through the campaign, with players earning Tactical Points that can be spent on additional effects that will impact future games. To determine missions, players will select two missions from the mission pool. The Aggressor then selects one of those missions to play. Each time a mission is played, after determining the victor, that mission is removed from the pool. When the mission pool is emptied, you re-add all the missions and start randomly determining missions. This campaign mode won’t use Advantage rules unless stated in the mission rules, the Aggressor will always be the Attacker. Campaign Victory Points are rewarded based on Battle Results. A major victory will score 3CVP, any other victory is worth 2, a draw is worth 1, and a loss is worth 0.
It’s worth mentioning earlier when we discussed the roll off for ties, while it is written that the winner of the roll off gets a minor victory, which would mean you get two points for the victory. It feels bad the extra point is determined by a roll off so I’d probably house rule that a draw is a draw and no roll off is needed.
This campaign mode also uses Tactical Points (TP), where each VP earned in the game is equal to 1TP. These can be spent by that player to use tactical ploys in future battles in this campaign. A few things to note:
- Protectors and Aggressors have their own set of Tactical Ploys.
- Each Tactical ploy has a cost associated.
- Each Tactical Ploy can only be used once per battle.
Aggressor’s Tactical Ploys features 5 Tactical Ploys, Unexpected Strike lets you change which mission is being played (that’s available to play). Desperate Gamble lets you gain an additional CVP if you win. Arterial Corridor lets you deploy an additional unit from from your army in an Entry zone. Deep Mapping gives Deep Strike to one of your units and allows it to deploy 6” away from enemy units. Dangerous Secrets gives you an additional Command Point at the beginning of a game.
Protector’s Tactical Ploys also gives 5 ploys; Temporary Stronghold gives you the under dog bonus for the game and denies it to your opponent, regardless of the point differential. Corralling the Foe lets you automatically veto a mission to play. From the Gloom lets you determine who is the attacker or defender for a mission. Void Oath gives one of your units at the beginning of the game a 4+ fight on death for the rest of the game. Heed the Alarms gives you an additional Command Point at the beginning of a game.
All in all, these campaigns seem like a great way to spend the afternoon, or set up a game day playing at your local store running a campaign or two.
Rob: I absolutely love this approach. This gives you four different ways to run Boarding Actions campaigns, using different terrain sets and rules, based on how you and your friends want to play. The only thing missing here is how you run something larger with more players, but I think there’s some solid inspiration here and it’d be easy to pair this with some of the older Boarding Actions missions to create bespoke campaigns. Our test games on Eldritch Depths were a blast.
The Missions
Boarding Actions splits 12 asymmetrical missions in half, each half utilizing either the Tomb World terrain or Boarding Actions Terrain. These all come together in various ways in the campaign, and they’ll use them in different orders depending on which version of the campaign you play.
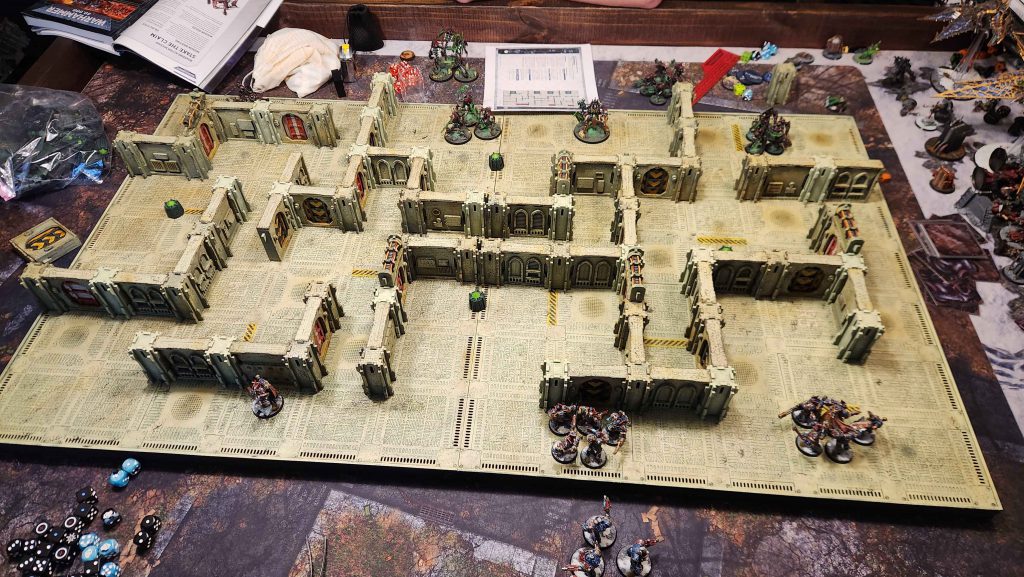
Tomb World Terrain Set Missions
The Tomb World missions are all designed to use breachable walls and the special bits and pieces packaged with the terrain kit. The most impactful of these is the Translocator Dais, which lets you teleport units across the table pretty easily. It's a double-edged sword, both allowing you to zip around as needed to accomplish missions and also giving your opponent an easy way to catch up.
These missions tend to favor the attacker, letting them take the first turn and often putting the defender on the back foot.
- Take the Artefact: The attacker has to raid the sarcophagus for an artefact and keep it away from the defender. The defender selects four entry points to use for the game, and secretly notes which sarcophagus has the artefact. The attacker scores for searching and holding onto the objective by the end of the game, while the defender gets points for destroying as much of the enemy as possible.
- Escape the Collapse: The attacker has to reach the other side of the board by the end of the game, while the defender drops collapsing debris onto the board. Attacker scores points for the total points that were able to escape, while the defender gets points for destroyed units. The Dais also start corrupted so there’s a chance of losing models for trying to scatter around the map.
- Decryption: The defender creates a pentatonic code that the attacker is trying to break. The defender will secretly create a code and the attacker has to control objective markers to reveal the code number. If all four digits are determined before the end of the game, the defender can then try to take objectives back and change the number. The attacker scores points based on how many correct numbers they guessed (whether or not they were able to reveal digits) and the defender scores points based on how many total points of destroyed units.
This was a very fun mission to play during our test game, though it’s worth noting that if the attacker can obtain two of the four digits, they have a very good chance of guessing a third and a one in six chance of just guessing the code outright. This mission might be better set up using digits 1 through 6 instead in order to make guessing the correct code less likely.
- Defence Grid Awakening: A Take and Hold-like mission. This one changes how the Daises on the map function. The attacker picks two Daises at random on the map and rolls a d6 for each one. On a 1-3, the Dais emits bright light, and units within 6" are blinded for -1 to hit. On a 4-6, the Dais opens each makeshift breach hatchway within 6", and units within range of those hatches suffer Mortal Wounds.
- Locate Escape Route: Another Take and Hold mission. No entry points, all units start in strategic reserves and lose the deep strike ability. Then the attacker selects one Translocator Dais, the defender selects two Translocator Daises, and the attacker selects a final one. These Daises are treated as active. At the start of each player's movement phase, for each Translocator Dais they have selected they can set up two units wholly within 3” of the Dais as if they were translocating. Units set up this way can still be selected to move later. During rounds 2 and onwards, in each player's movement phase, they choose one of the Daises that their opponent didn’t pick, destroy all models within 3” of that Dais, and can then deploy up to two units wholly within 3” of that Dais. Destroyed units also respawn and are added back to your army. This just sounds like a wild ride.
- Errant Translocators: Another take and hold mission, with the added Warlord Assassination progressive objective. This one uses the Translocator Daises as objective markers and adds some additional rules to them. The Damaged Phase Aligners rule is always in effect, and instead of selecting when and how many units translocate, units only translocate when rules instruct them to. The attacker will randomly determine one of the Dais, and then the players will roll off. Starting with the winner, each player will select one unit within range of that Translocator Dais and proceed to translocate a unit, until all units withing range of that Translocator Dais have done so. And when translocating to a destination, they can do so within 6” instead of 3”.
Each one of these missions adds some nice twists to the game and utilises the Tomb world terrain really well. As we mentioned, they tend to be weighted toward the Attacker but that’s not necessarily a bad thing - the Defender has to work hard and these are fun missions to play with a Necron Defender trying to keep invaders out of their Tomb World complex.
Boarding Actions Terrain Set Missions
- Divide and Slaughter: This is a take and hold like mission, giving you 5 points for each objective you hold. However, each player has a unit that starts trapped in the kill ground zone, and cannot leave until their opponent’s trapped unit is destroyed.
- Seek and Destroy: The attacker wants to rush in and destroy objective markers found in the Containment Leak Zone, and while within the Containment Leak Zone, models are unable to make ranged attacks. This can make shooting focused armies difficult to play as the Containment Leak Zone covers almost 60% of the map. The defender scores points at the end of the battle for each objective not destroyed, and additional points for those objectives with OC1+ models within range. You’ll have to utilize the hatchways to set position outside the zone to prevent the enemy from destroying all the objectives.
- Reinforcements Inbound: The defender selects 1-2 units to be inbound, and for each inbound unit, they will secretly note which arrival zones they will deploy from. These units arrive at the start of the defender's turn if the attacker controls two or more objective markers or the fourth battle round, whichever comes first. The attacker scores 5 points for each objective marker they control; however, the defender does not start scoring until the inbound units have arrived on the battlefield. With additional points rewarded each turn if the warlord was destroyed or not. This mission has tons of ways to score points, and the attacker has a way to delay defenders from getting reinforcements.
- Sabotage: The attacker is trying to burn it all down. At the end of each of the defender's turns, the attacker may attempt to set each non-alight objective they control alight; objectives that are set alight in this fashion deal Mortal Wounds to all units within their fire section. At the end of each of the attacker's turns, the defender can attempt to extinguish the flames. Players score 20 points per objective (alight or not) at the end of the battle.
- Let None Live: The ship is going down, and defenders are trying to escape via drop pods. The defender can only set up one unit per entry zone while the rest start in reserves, using the reinforcement entry zones later. The attacker wants to destroy the drop pods, and for each one destroyed they score 30 points. Throughout the game, random drop pods are removed from the battlefield, rewarding 20 points if the defender controls it or 10 points to the attacker if they control it. This one requires a fast attacker to be able to reach all the objectives.
- Locked Down: Different zones of the battlefield have locked down hatchways which do not unlock until the start of the second, third and fourth battle rounds. Locked down hatchways cannot be operated until unlocked. Scoring is 5 points per objective marker controlled, with additional points scored at the end for holding specific pairs of objectives.
While some of these missions have complex environmental rules, the primary mission is usually kept simple, allowing more time to be spent focusing on these additional rules. Depending on the mission, however, we did feel some slow moving attacking armies struggled to complete their primaries, getting tarpitted by stronger foes or being unable to get to the opposite end of the field in time to make the score worthwhile.
Final Thoughts
Andrew: It is exciting to see GW hasn’t abandoned Boarding Actions like so many of its other 40k add-ons (I’m looking at you Apocalypse). Outside of acquiring the terrain it’s a very accessible and well thought out system; missions feel refreshing giving you a taste of symmetrical and asymmetrical missions. Tomb World gives a different taste of the traditional boarding actions, and the assumption is that we may get more B detachments as we continue through these releases. Hopefully we get a nice balance pass of the older Detachments that coincide with these newer units being released.
Rob: This is exactly the kind of campaign supplement I’d like to see more of from Games Workshop - and that’s not just for Boarding Actions. Having multiple ways to run campaigns with different structures and flows makes this much less of a campaign supplement and much more like a sourcebook for Boarding Actions and that’s more of what narrative players need out of Games Workshop products. Also, the Necron terrain rules are great - the Translocator Dais is a must-have in games of Boarding Actions.
Boarding Actions remains my favorite way to play Warhammer 40k and it’s a shame it has so little support from Games Workshop. I’d love to see them replace Combat Patrol with Boarding Actions - it’s a much tighter way to play and just generally feels more balanced and inventive. Now I just need to figure out how to combine it with Crusade.
Have any questions or feedback? Drop us a note in the comments below or email us at contact@goonhammer.com. Want articles like this linked in your inbox every Monday morning? Sign up for our newsletter. And don’t forget that you can support us on Patreon for backer rewards like early video content, Administratum access, an ad-free experience on our website and more.
Thank you for being a friend.


 Infinity N5 First Principles: Understanding the Outcomes of Face to Face Rolls
 Tactical Feedback: Timing the Go-Turn
 SRM's Roundabout to Adepticon 2026: Curd Is the Word