
I knew when we first started tossing around the idea for a series on gaming rooms that my story would have to be one in multiple parts. In part because I’ve built multiple set-ups over the last 10 years and in part because there’s a ton to say on the subject, with many different types of players whose space and needs are different, and so it would be helpful to try and cover as many of my setups as I could in order to be helpful to them. Over the last ten years I’ve gone from a one-bedroom Manhattan apartment to a two-bedroom in Jersey City to a decent-sized house in Houston, and for each of those my gaming space has changed dramatically.
Today I’m kicking off my three-part series talking about the first space I built while I was still living in Manhattan - a space that wasn’t really my own - and the planning and requirements that came along with that.
 A photo I took walking home one time along the West Side Highway. Living in BPC was pretty great.
I’d wanted to live and work in NYC ever since I spent a summer at my grandmother’s place in Queens. Few places on earth buzz with the same energy as the city and as a kid I’d loved going to Neutral Ground to play in Magic and Overpower tournaments. Later I’d hoped very badly to attend NYU (but been unable to afford it). So it wasn’t a shock when, shortly after my wife and I married in 2010, we moved to the city. We had a small apartment in Battery Park City that at the time, was a steal at $2500 per month for about 700 square feet.
Moving away from your friends, even as an adult, is tough. It takes time to build new networks in new places and it’s easy to lose touch with the friends you leave behind. Staying friends isn’t something you can just take for granted, either - bridging gaps in lifestyle and geography takes a lot of work. I’d been looking for a reliable way to do that when, in 2012, my parents moved to Wilmington, Delaware. I’d recently come back around to 40k in 6th edition, and now that I had a place to stay that was only an hour from my Maryland friends, it seemed like the perfect time to start making regular trips down to play. We started playing at Greg’s house, in the table he kept in the basement. It was a good start, but I wanted to build a setup of my own, in part so that we could alternate between driving down there from my parent’s place and them coming up, and in part because I wanted to build a nice table.
 Playing in Greg's basement
Alright 500 words in and I’m finally getting to the part about building the space. My parents are great – they’re absolutely game for my weird hobby bullshit, and if it meant me visiting more often, they were absolutely up for me storing stuff at their place. My mom pulled the pro strat of asking us what toiletries we wanted so we could just stock the bathroom down there, ensuring we wouldn’t have to travel with any of that bullshit. The guest bedroom was functionally ours, since we were using it about once per month.
Despite this however, it was still their space, and I needed to be mindful of how much of it I’d use and where we’d put things when they weren’t in use. So there were a few considerations I’d need to take in mind when building this particular space:
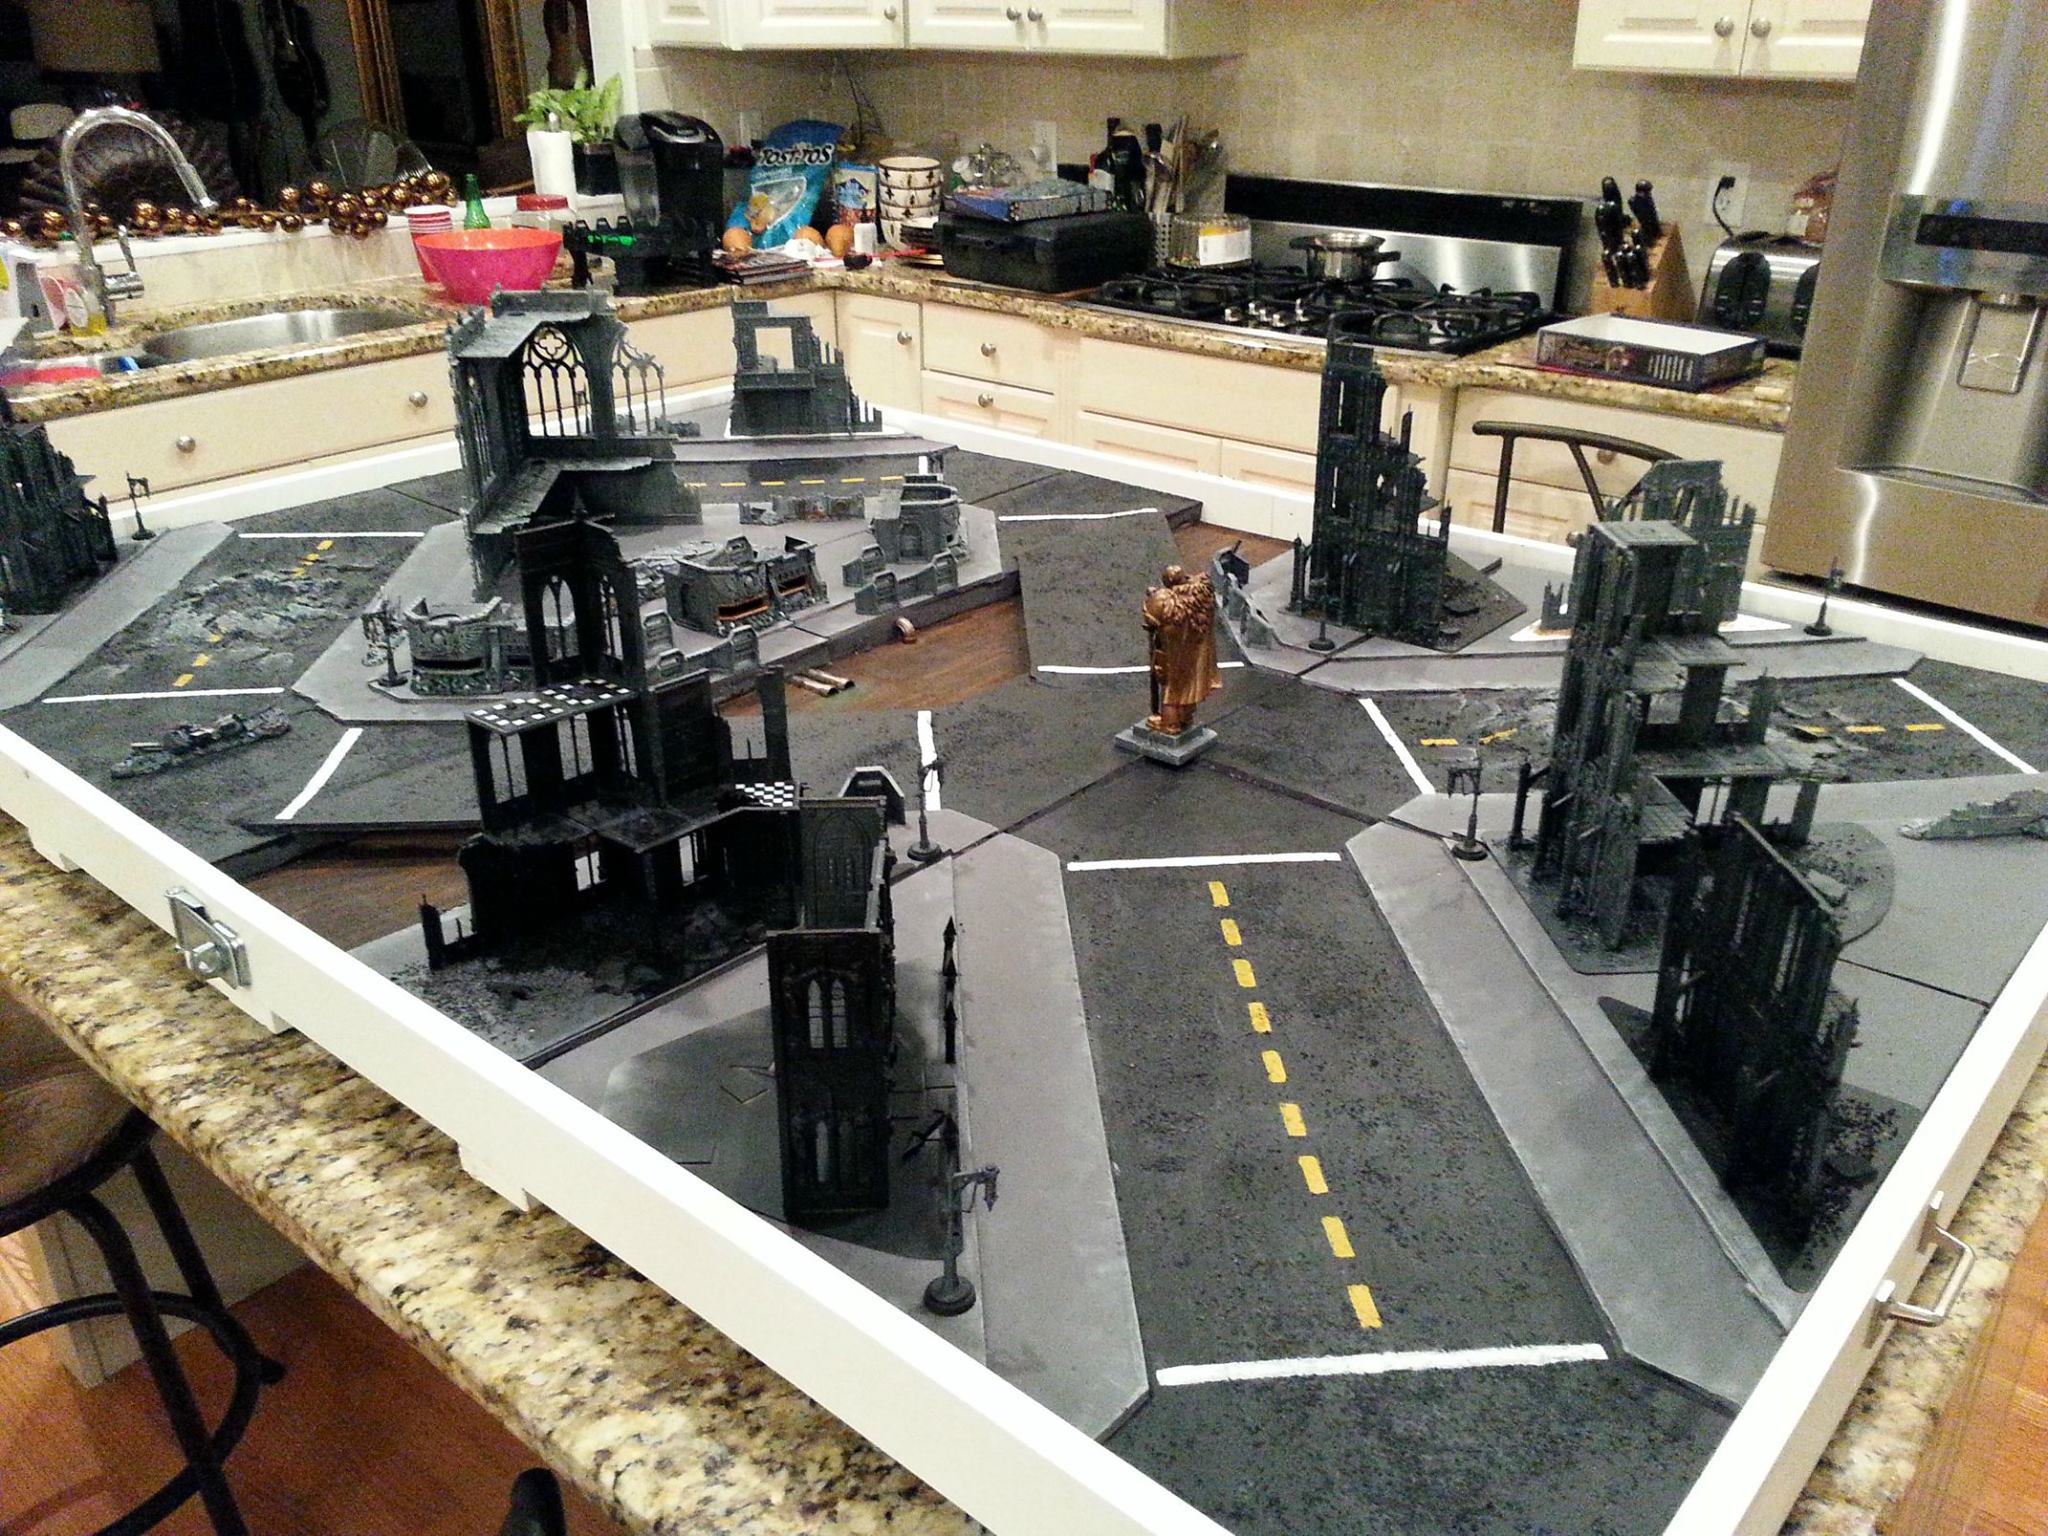
One of the best things about my parents’ house in Delaware was that they had a large (bigger than 6’x4’), marble-top island in their kitchen that was perfect for playing a game on, and they were cool with me using it for this purpose. That’s a great start, but it does mean that we’d need to set down something on top of that surface. Now these days I’d just put a mat down and call it a day but at the time mats were actually pretty rare and also, I wanted M O D U L A R T I L E S. So I decided to build something a little more detailed. In order to build something to suit both purposes, I needed a frame to hold the tiles.
I’ve talked before about building the table for my parent’s house – you can follow along on the construction details here – but one key element to it was that the frame needed to be both easy to store in their garage and also be something we could transport up a flight of stairs, to their second-floor kitchen. And so the frame was designed and built to be in two halves that hinge-lock together in the middle.
The next thing I had to be mindful of keeping this stuff at my parent’s place was how I’d store everything – They had some closet space but a lot of it needed to be kept in the garage. That meant I’d need to put the tiles I built on a shelf, which would mean stacking them together. When I was designing my tiles, this meant they had to be relatively flat, and couldn’t incorporate features that would get messed up when I sat other tiles on top of them.
Gaming in the kitchen was great, but I needed to be mindful of things like the surface we were playing on. So I took care to round corners on the table where possible and put plastic feet under the frame to avoid scratching the countertops.
Ultimately most of the decisions that went into this space were based on creating something that could be set up and broken down quickly, and would store in a compact enough space that it wouldn’t be a burden on my folks. The space itself was interesting because storage and flexibility were the key concerns – they had a large, open space to game that was very comfortable, so the space itself wasn’t really an issue. I’d take many of the things I learned building this space with my to my next apartment, when I built my own gaming space in a 2-bedroom Jersey City apartment a couple years later.
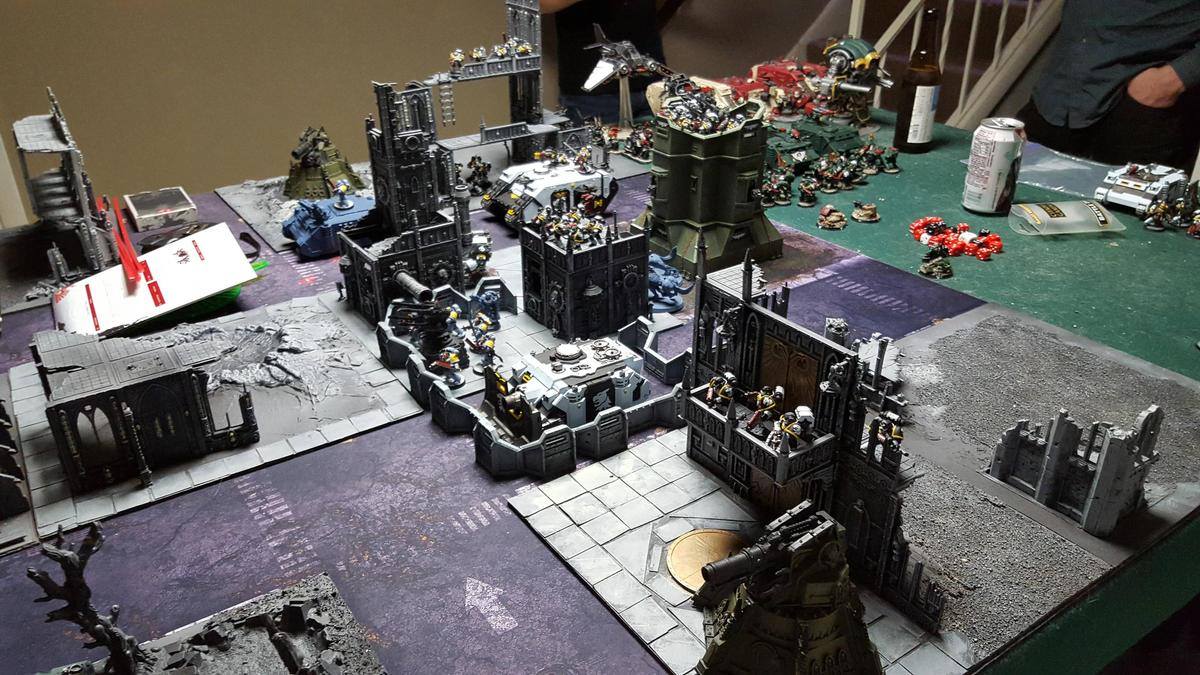
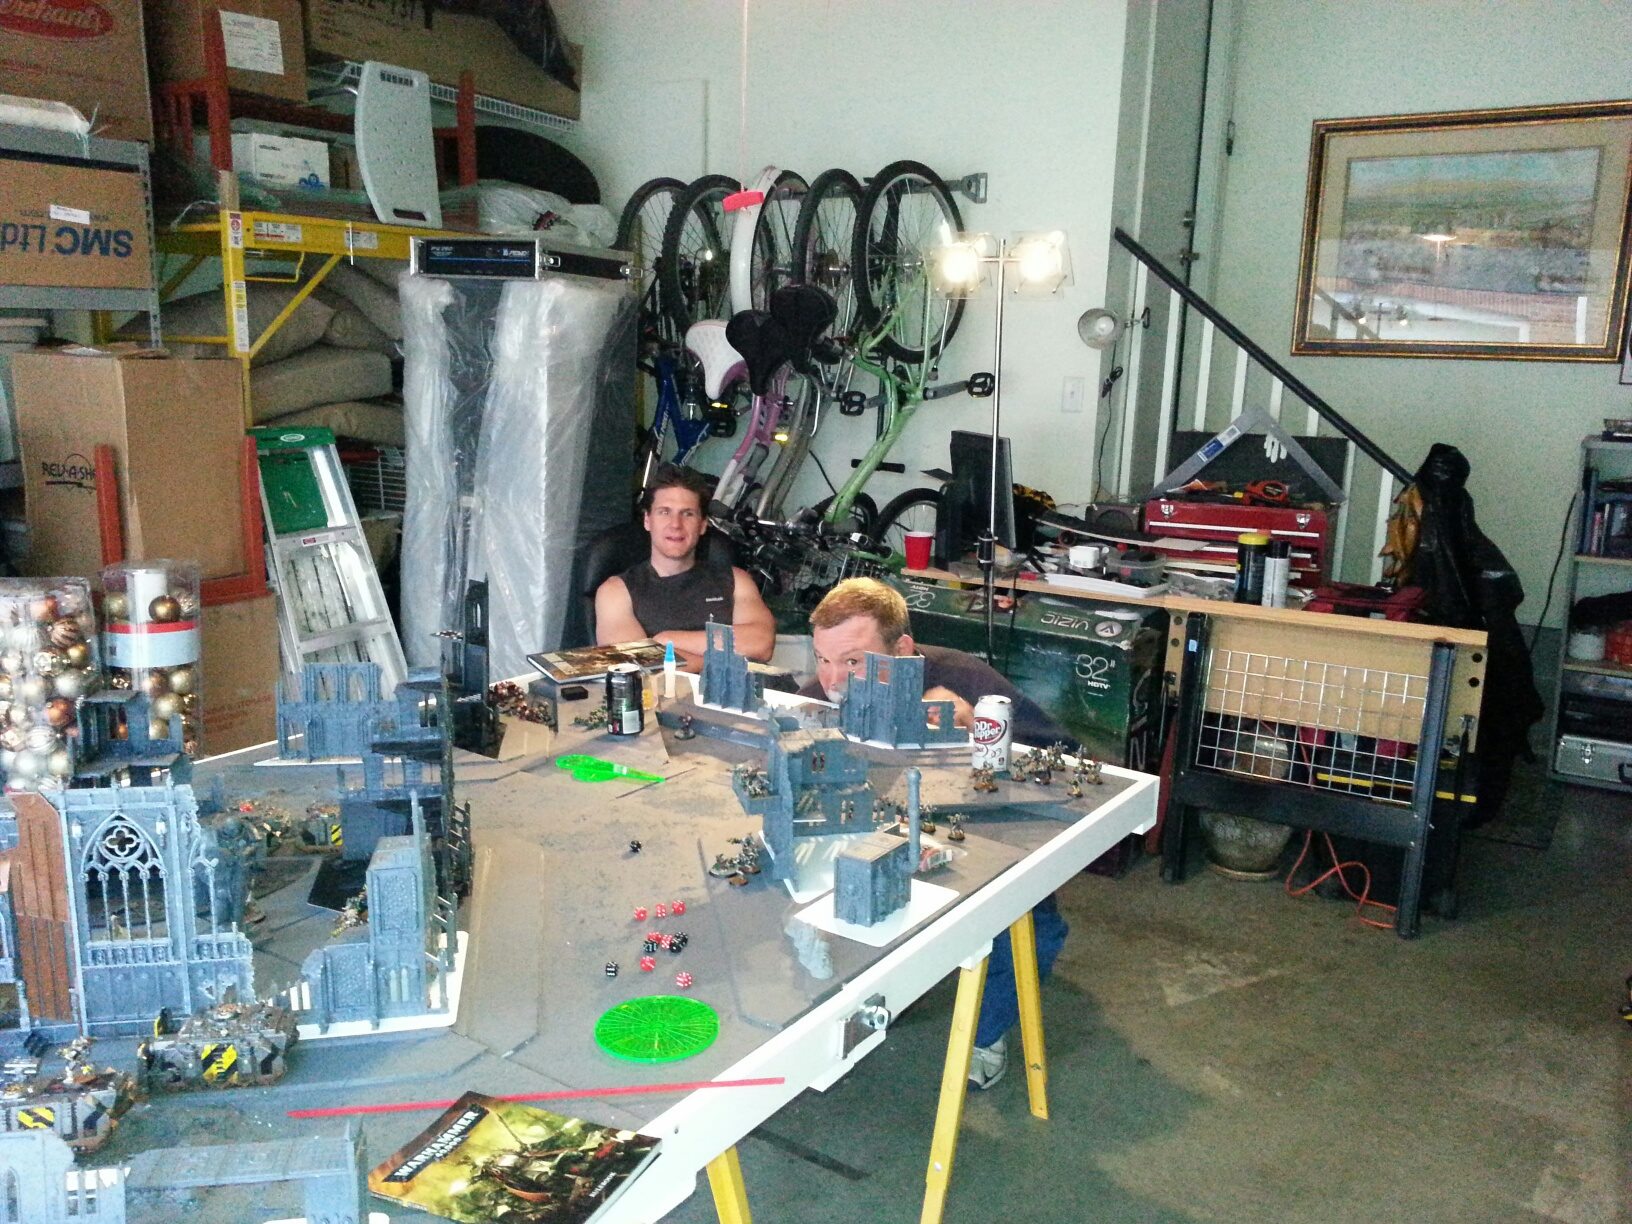 My dad and my friend Eric hanging out as I play Greg on the then-unfinished table in the garage
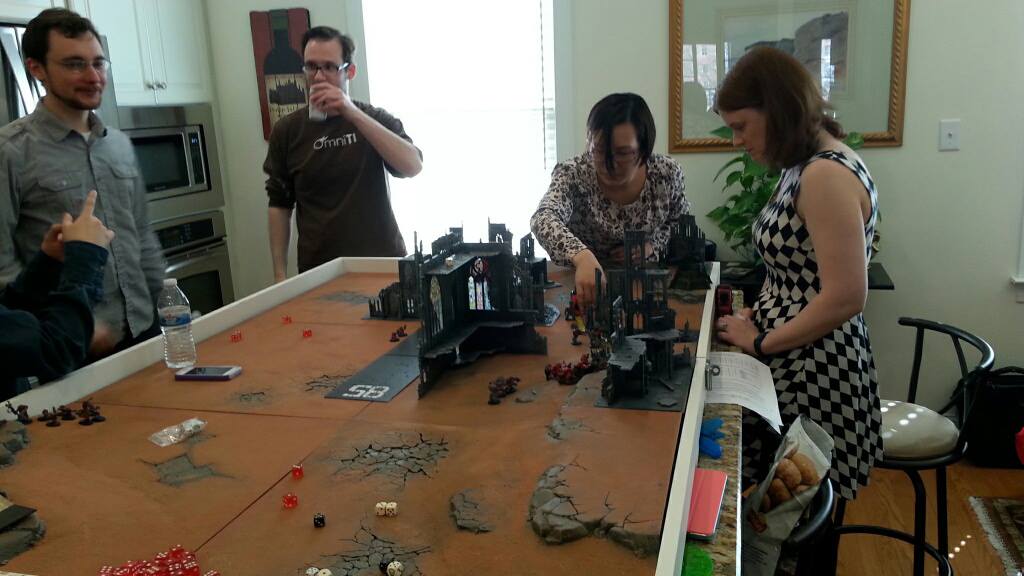 Our crew getting together for some kitchen slams\
 Another day of slamming hams complete
Tags:

Thank you for being a friend.
 Infinity N5 First Principles: Understanding the Outcomes of Face to Face Rolls
 Tactical Feedback: Timing the Go-Turn
 SRM's Roundabout to Adepticon 2026: Curd Is the Word
Support us on Patreon to get access to our Discord and exclusive App features.
Thank you for being a friend.
Already a Patron? Login with Patreon.
Visit our incredibly official store on RedBubble.
![]()
![]()
Support us on Patreon to get access to our Discord and exclusive App features.
Thank you for being a friend.